Friday, July 3, 2020

My Favorite Time of Year... is the Time We Go To Disney. Unfortunately, we won't be going this year, but you can always reminisce by scrapbooking your old photos. CTMH is now offering some amazing Disney stuff. 

Description
• Five downloadable SVG files.
After downloading the images, you can manipulate them in a program like Cricut Design Space™. Resize it, remove layers, and much more! Each different color in the image indicates different layers that can be edited and cut individually with your chosen software and personal cutting machine.


Description
Includes:
1 – Happiest Place Stamp + Thin Cuts (CC7206)
1 – Happiest Place Paper Packet + Sticker Sheet (CC7201)
1 – Happiest Place Coordinating Cardstock (CC7203)
1 – Happiest Place Cut Above® Layout Kit (CC7208)
1 – Happiest Place Acrylic Shapes (CC7204)


Tuesday, April 21, 2020

National Scrapbooking Day

Craft along with us to celebrate National Scrapbooking Day this year!

oin Close To My Heart for a day filled with creativity and fun as we celebrate National Scrapbooking Day on Saturday, May 2! Everyone is welcome to join in and watch the FREE event on our Close To My Heart Facebook Page! We will be demonstrating some fabulous creative projects during the event that you can create along with us by using the products and bundles below!

Monday, February 3, 2020

10 Heat Transfer Vinyl Tips for Beginners

Heat Transfer Vinyl Tips #ctmh #closetomyheart #heattransfervinyl #diy #vinyl #vinyltips #heatpress #cricut #scrapbooking #albumcovers #scrapbookalbum #scrapbook #cardmaking #papercrafting #htv #giveaway #free
Heat transfer vinyl is one of the newest products to join the Close To My Heart ranks. We are absolutely loving working with it and are eager to help anyone who may be new to vinyl discover practical tips, tricks, and uses for this awesome material! Whether you’re applying it on an album cover or directly onto your cards or scrapbook pages, heat transfer vinyl is an awesome, multi-use medium, and it’s definitely one of our favorites. To address some tricky questions or to simply just get you started on the road to using heat transfer vinyl in your own crafts, we’ve put together a list of ten tips for vinyl beginners.
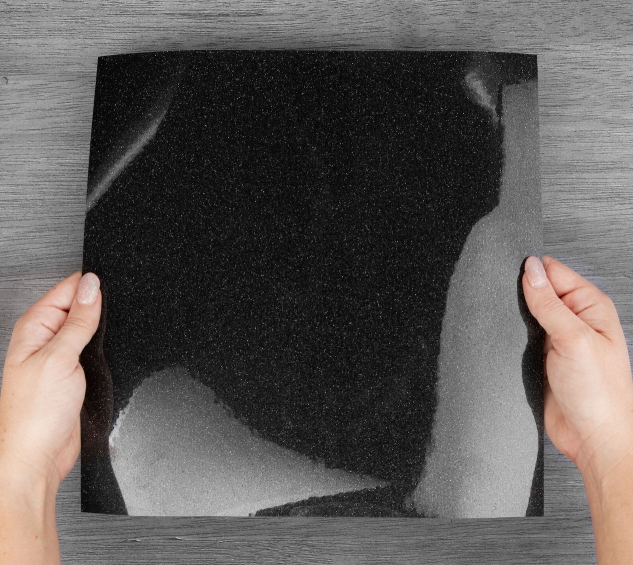
1.  Keep the carrier sheet intact. The carrier sheet is the film backing on the vinyl that is there to keep your vinyl designs together. It is important that you do not cut through it. If you do, you may end up with various separate pieces that make up your design, which will make it a lot harder to position and apply to your project. To keep the carrier sheet intact, always make sure that the shiny side of the vinyl is facing DOWN when you position it on your cutting mat and that your cutting machine is set to vinyl.
Heat Transfer Vinyl Tips #ctmh #closetomyheart #heattransfervinyl #diy #vinyl #vinyltips #heatpress #cricut #scrapbooking #albumcovers #scrapbookalbum #scrapbook #cardmaking #papercrafting #galaxyblackglitter #blackglitter #htv #giveaway #free
2.  Use a scraper tool to remove any bubbles and smooth your vinyl on your cutting mat. Having bubbles in your vinyl will potentially result in messy application. As you apply vinyl to your cutting mat, gently glide a scraper tool over the surface for a flawlessly smooth cutting surface.
Heat Transfer Vinyl Tips #ctmh #closetomyheart #heattransfervinyl #diy #vinyl #vinyltips #heatpress #cricut #scrapbooking #albumcovers #scrapbookalbum #scrapbook #cardmaking #papercrafting #scrapertool #htv #giveaway #free
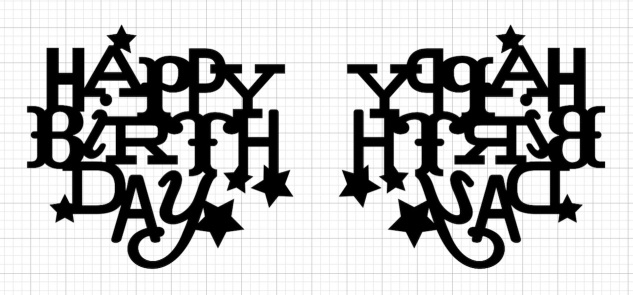
3.  Always cut the mirror image of your vinyl designs. When applying heat transfer vinyl onto a project, the carrier sheet will be facing UP. That means, when you cut your designs with the carrier sheet facing DOWN (as discussed in tip #1) you’ll want to cut a mirror image of how you want the final image to appear on your project. Otherwise, you’ll end up cutting all your project pieces backwards. This is mostly a problem if you’re using words in your design.
In Cricut Design Space™, you can accomplish this by inserting your images or text on your Design Space canvas, and selecting the “Flip” option, located on the toolbar at the top of the page. By flipping your image horizontally, you’ll be able to cut the mirror image of each desired shape without jeopardizing the carrier sheet.
Heat Transfer Vinyl Tips #ctmh #closetomyheart #heattransfervinyl #diy #vinyl #vinyltips #heatpress #cricut #scrapbooking #albumcovers #scrapbookalbum #scrapbook #cardmaking #papercrafting #designspace #mirrorimage #htv #giveaway #free
4.  Once you’ve cut your image in the vinyl, you’ll need to remove the excess vinyl from the carrier sheet before applying it to your project. This process is called weedingTo make weeding easier, heat your work surface for a few seconds, then weed over the heated surface. The heat will loosen the vinyl from the carrier sheet, making it easier to peel off the excess.
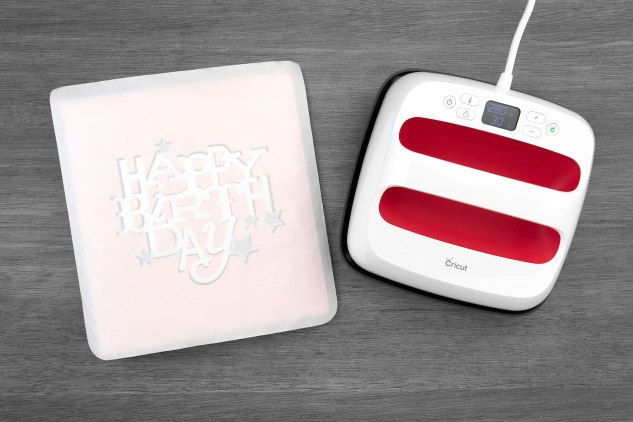
5.  For better results, heat your project for a few seconds before placing the vinyl on it. To ensure that you don’t scorch your project, use a protective sheet between your heat source and the project surface. You will need to purchase a protective sheet separately from most heat presses. If you don’t have ready access to a protective sheet or you don’t wish to purchase one, you can use a thin t-shirt or towel to shield your project. If desired, you can also use this protection as you apply the vinyl to your project.
Heat Transfer Vinyl Tips #ctmh #closetomyheart #heattransfervinyl #diy #vinyl #vinyltips #heatpress #cricut #scrapbooking #albumcovers #scrapbookalbum #scrapbook #cardmaking #papercrafting #htv #heatpress #easypress #giveaway #free
6.  When you get ready to apply the vinyl to your project surface, use a little bit of pressure on the heat press for better and faster application. You don’t need to put your entire weight onto your press, but a small amount of pressure is recommended.
7.  Don’t over-press your vinyl by keeping heat on it for too long. Start with 10–15 seconds and add more time if needed. Most heat presses come with an adjustable timer to help you keep track of your time.
Heat Transfer Vinyl Tips #ctmh #closetomyheart #heattransfervinyl #diy #vinyl #vinyltips #heatpress #cricut #scrapbooking #albumcovers #scrapbookalbum #scrapbook #cardmaking #papercrafting #htv #heatpress #easypress #giveaway #free
8.  If you’re using an iron, you’ll need to keep a closer eye on your project to prevent scorching. Since heat settings vary, start on a lower heat setting and work up as needed.
9.  After applying heat transfer vinyl, you can peel the carrier sheet away from the project’s surface while it’s still hot. If you’re working with glitter vinyl, however, it’s best to peel it when it’s warm. (Just be sure you don’t burn your fingers!)
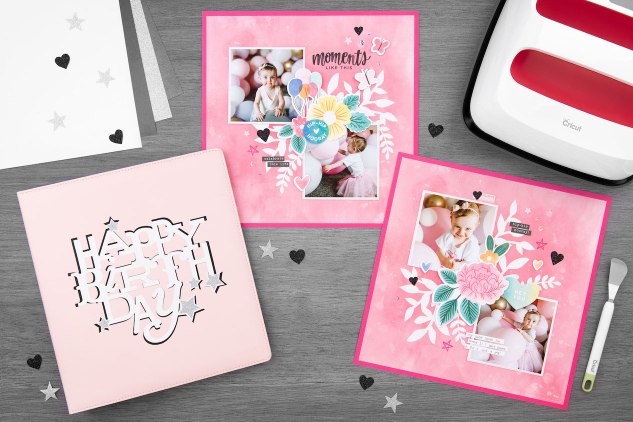
10.  If you want to layer your vinyl, you can! However, we recommend that you don’t put any layers on top of glitter vinyl. The surface of the glitter vinyl will prevent any other vinyl placed on top of it from adhering and sealing properly. You can layer glitter pieces over other types of vinyl, but if you’re incorporating glitter vinyl into your projects, leave it on top, as you see in the photo below.

Heat Transfer Vinyl Tips #ctmh #closetomyheart #heattransfervinyl #diy #vinyl #vinyltips #heatpress #cricut #scrapbooking #albumcovers #scrapbookalbum #scrapbook #cardmaking #papercrafting #htv #heatpress #easypress
We hope this closer look at vinyl has helped you get excited about this awesome material! As a special treat, we’re giving away a custom vinyl pack to three lucky readers! These custom packs will include one 11.8″ x 12″ sheet of each of the four different heat transfer vinyls featured in today’s blog artwork (1 White, 1 Black, 1 Silver Glitter, and 1 Galaxy Black Glitter). For a chance to win, make sure you’re subscribed to this blog and leave a comment below telling us what you are creating or want to create with heat transfer vinyl! All entries must be in by 2 p.m. Wednesday, January 29, MST. Contest winners will be notified via email. Good luck! 😉

Recipes
Cricut® Shapes:
Artistry#M410373
8½” x 11″ Happy Birthday Album CoverZ5309 Ballerina 8½” x 11″ Everyday Life™ AlbumZ3571 White Heat Transfer VinylZ3572 Black Heat Transfer VinylZ3576 Silver Glitter Heat Transfer Vinyl, Cricut® Artistry Collection, Cricut EasyPress™ 2
Cricut® Shapes:
Artistry#M4187B1
Basic Shapes#M36989A

Tuesday, January 14, 2020

Hello CRAFTERS! This month is papercrafting month. Here is a great article by CTMH! 

All Around Creativity: Adding A Splash of Color

adding-color-to-wooden-wreaths-hero
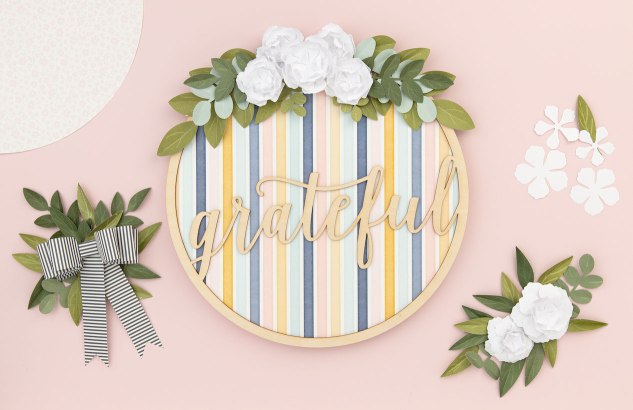
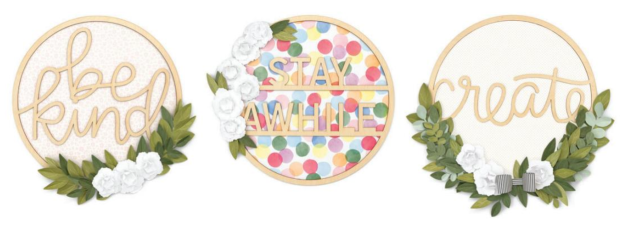
We’re jumping right into the new year and celebrating National Papercrafting Month with the All Around Creativity special, featuring four gorgeous wreath kits that are only available from Close To My Heart through the end of the month. There are so many different ways to embellish  these beautiful wreaths, so we figured we’d have some fun and share with you four simple ways that we’ve added color to the plywood bases.
Adding color to wood doesn’t need to be super messy or take a huge amount of time. It can be quick, easy, and clean. To start off, we’ll take a peek at one of the easiest wood-coloration techniques. This method uses an Exclusive Inks™ stamp pad and will only take you a few minutes from application until it’s completely dry!
adding-color-to-wooden-wreaths-create
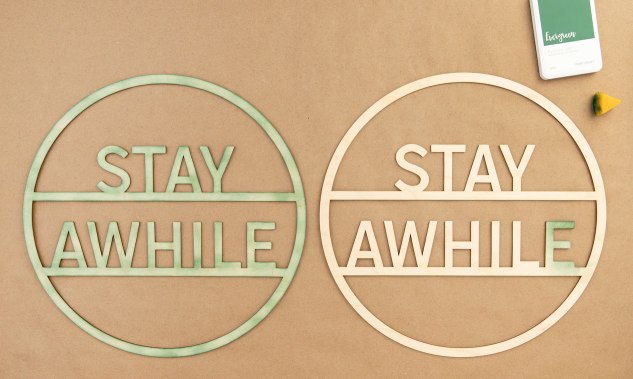
Simply select the ink color you’d like to use and gently swipe the stamp pad over the surface of the wood with quick, dabbing motions, going with the grain. Going with the grain helps you to emphasize the natural beauty of the wood, while also protecting your stamp pad from getting scratched up or caught on the wood. As you’ll see in the video below, we left some of the wood grain visible for a more stained look, but you can make it as light or as dark as you’d like.
To achieve a softer, mottled look, try sponging the ink onto the wood.
adding-color-to-wooden-wreaths-stay-awhile
Cut a Round Sponge into quarters. While gripping the point of one quarter with your fingers, gently load your sponge with ink by pouncing it on your stamp pad. Because the sponge absorbs the ink, it may not look like you have a lot on there, but you’ll have more ink than you think!
Once you’ve got your sponge inked and ready to go, use the same pouncing motion you used on the stamp pad to apply the color to the plywood. The ink will dry lighter than it looks while you apply it. For a darker, richer tone, you will have to apply additional layers of ink.
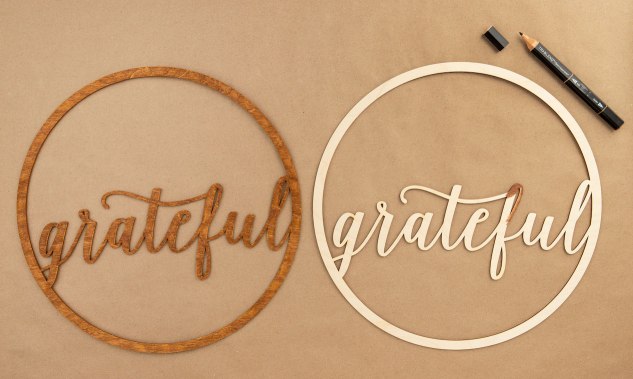
This next technique uses TriBlend™ markers. When using an alcohol-based marker to color wood, you’ll want to go in the direction of the grain and use a steady hand to achieve even color throughout.
adding-color-to-wooden-wreaths-grateful
Because you have greater control over color distribution when you use this method, you also have more control over the appearance of the colored wood. For instance, if you want a softer, lighter look, use a light hand and don’t go over the same spot too many times. For darker and richer tones, add more color layers to really get the pigment into the wood.
If you’re going for a darker color, don’t jam the marker tip into the wood, as this may damage your marker. Instead, go over the same area of the wood multiple times for color layering and try using a lighter shade of your TriBlend™ marker.
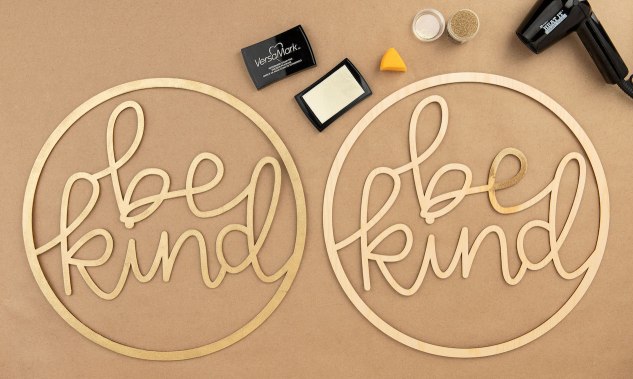
The last technique we’re showcasing today adds a bit of sparkle to your art. Heat embossing! (We went there, and it’s beautiful!)
adding-color-to-wooden-wreaths-be-kind
First, place your wreath over a piece of scratch paper so you can catch any excess embossing powder. Then, begin by rubbing the surface of the wreath with an anti-static pouch. Apply VersaMark™ ink to the wreath, a few sections at a time, using the same pouncing motion you saw in our first technique. While the ink is still wet, sprinkle embossing powder over it, shake off any excess powder onto your scratch paper, and heat set with a heat tool. (Use your scratch paper to easily funnel your excess embossing powder back into its container for future use.)
We absolutely love these wreaths and National Papercrafting Month, because it really gets us thinking outside the box! We can’t wait to see all the different ways you choose to add color to your wreaths.
Remember, you can only get these gorgeous wreath kits until January 31, and if you buy four or more you even get a discount! Make sure to take full advantage of the All Around Creativity special while you still can. For a few of you who may be on the fence, we are giving away four of these kits to four lucky readers! For a chance to win, you must do two things. First, make sure you are subscribed to this blog. If you are not, find the blue button on the sidebar that says “Subscribe to list” and follow the prompts once you’ve clicked it. Second, leave us a comment below telling us what types of crafts you like to work out, outside of scrapbooking and cardmaking. You have until 12 p.m. (MST) Thursday, January 9, to submit your entries. All winners will be notified by email. Good luck and happy crafting!

Recipes

Share this:

An Inside Look into Our New 2020 Catalog!

New Year Catalog #ctmh #closetomyheart #scrapbooking #cardmaking #papercrafting #ctmhohmyheart #ctmhallaroundcreativity #nsm #nationalscrapbookingmonth
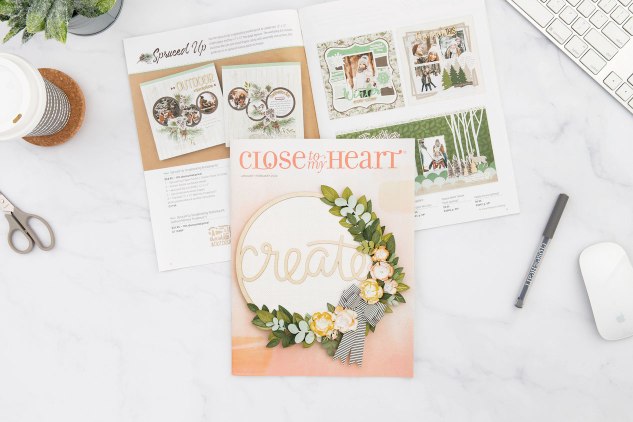
Happy New Year’s Eve everyone! It is officially the last day of the year, can you believe it? Tomorrow not only brings with it renewed aspirations and hope in new beginnings but, also, a brand new Close To My Heart catalog filled from cover to cover with new pattern papers, stamp sets, embellishments, new and original ideas, and much, much more!
Since the products in the new January–February 2020 catalog will be available for viewing and purchasing immediately after midnight tonight, we just had to ring in the new year a little early and share! Celebrate with us and take a sneak peek into just a few of our new favorites that have us excited for what’s to come!

Holographic Paper

New Year Catalog #ctmh #closetomyheart #scrapbooking #cardmaking #papercrafting #ctmhohmyheart #ctmhallaroundcreativity #nsm #nationalscrapbookingmonth #holographicpaper
This new eye-catching holographic paper is a must have! We’ve got two reflective colors to choose from, Oasis (on the left) and Dreamy (on the right). Take a close look at this new product and some additional artwork examples with our Art Studio Director, Karen, in the short video below.

Card Front Spinner Thin Cuts

New Year Catalog #ctmh #closetomyheart #scrapbooking #cardmaking #papercrafting #ctmhohmyheart #ctmhallaroundcreativity #nsm #nationalscrapbookingmonth #cardfront #spinner #thincuts
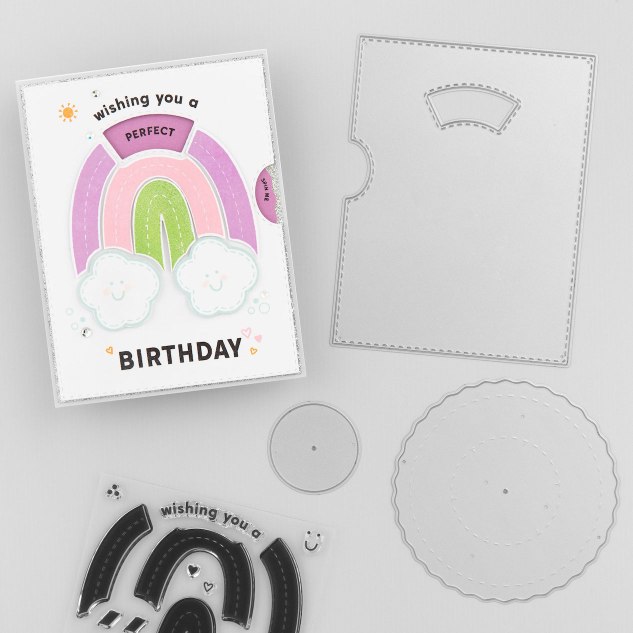
The Card Front Spinner Thin Cuts is a set of 3 metal dies that allows you to create an interactive spinning card front. As you spin the wheel on the side, part of a hidden message is revealed in the cutout window.
New Year Catalog #ctmh #closetomyheart #scrapbooking #cardmaking #papercrafting #ctmhohmyheart #ctmhallaroundcreativity #nsm #nationalscrapbookingmonth #cardfront #spinner #thincuts
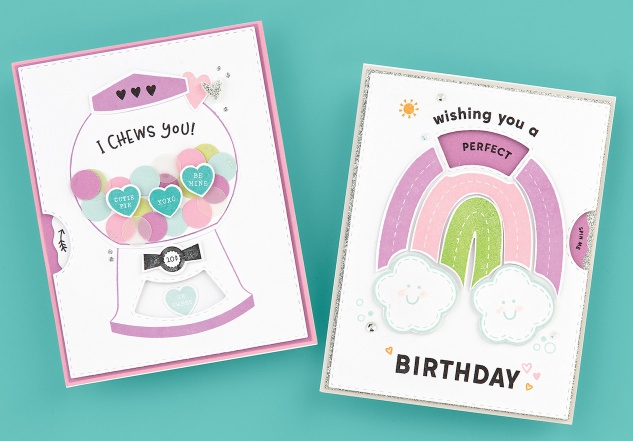
Both stamp sets shown here, My Acrylix® Rainbow Wishes and My Acrylix® I Chews You, coordinate seamlessly to add a fun, interactive spinner element to your cards.
New Year Catalog #ctmh #closetomyheart #scrapbooking #cardmaking #papercrafting #ctmhohmyheart #ctmhallaroundcreativity #nsm #nationalscrapbookingmonth #spinnercard

Stitched Bracket Thin Cuts

New Year Catalog #ctmh #closetomyheart #scrapbooking #cardmaking #papercrafting #ctmhohmyheart #ctmhallaroundcreativity #nsm #nationalscrapbookingmonth #ThinCuts
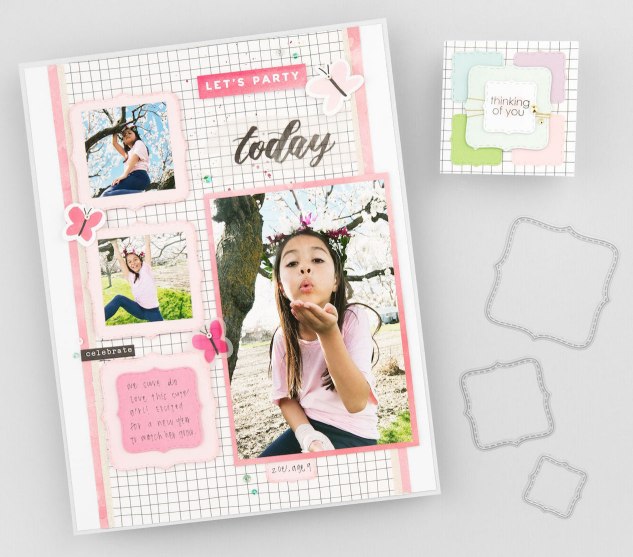
The Stitched Bracket Thin Cuts are an easy way to mat photos, journaling, and anything else you may want to highlight in your art. This set is just one of MANY Thin Cuts sets available in this upcoming catalog.

Two New Shimmer Brushes

New Year Catalog #ctmh #closetomyheart #scrapbooking #cardmaking #papercrafting #ctmhohmyheart #ctmhallaroundcreativity #nsm #nationalscrapbookingmonth #shimmerbrush
We are adding two new colors to our line of shimmer brushes, Lagoon and Raspberry! We just love adding some colorful shimmer to artwork!

All Around Creativity

New Year Catalog #ctmh #closetomyheart #scrapbooking #cardmaking #papercrafting #ctmhohmyheart #ctmhallaroundcreativity #nsm #nationalscrapbookingmonth
Our National Papercrafting Month special is so sensational that we’ve included it in our January–February catalog just to show it off in as many places as we can! This special features exclusive wooden wreath kits. Each kit comes with a 16″ plywood base of your choice ready to embellish with paper flowers, leaves, patterned background papers, and even a paper bow!
New Year Catalog #ctmh #closetomyheart #scrapbooking #cardmaking #papercrafting #ctmhohmyheart #ctmhallaroundcreativity #nsm #nationalscrapbookingmonth